Key facts: Sewer Camera Inspection
- A sewer camera inspection records the inside of the lateral and pinpoints defects so the repair can be planned before excavation.
- Indianapolis homeowners own the lateral from the house to the main connection, so the inspection is usually their call to arrange [1].
- Routine cleaning and root removal need no Citizens permit, but the repairs a camera often leads to do [1].
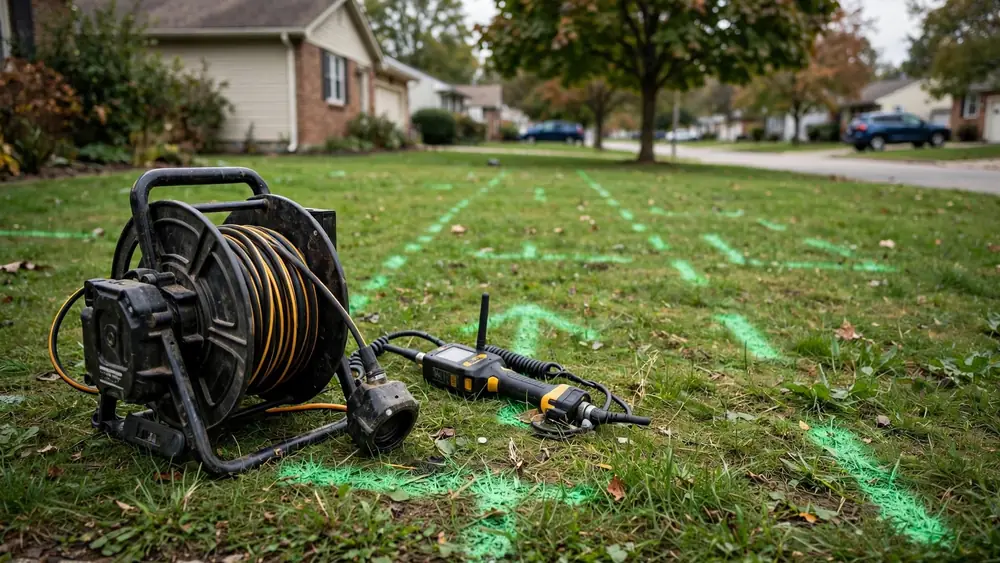
- A transmitter on the camera head lets the contractor mark the defect's location and depth on the ground.
How it works
What a sewer camera actually does
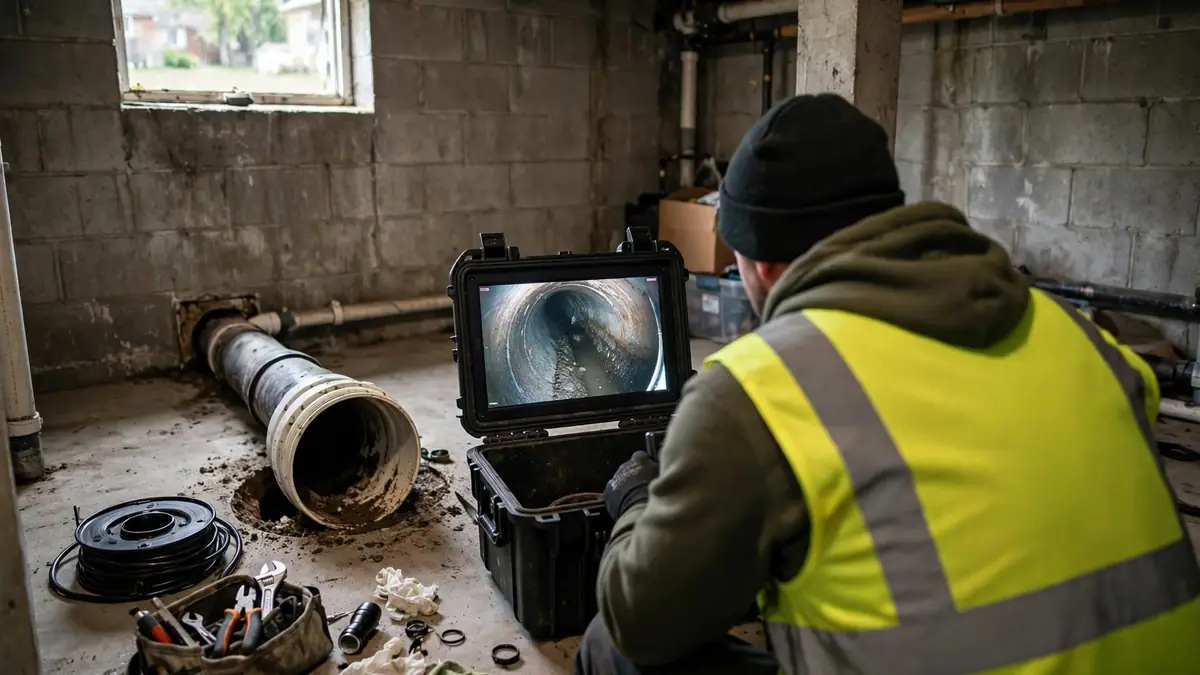
A sewer inspection camera is a small waterproof lens and light on the end of a stiff, coiled push cable. The contractor feeds it into the line through a cleanout, a pulled toilet or a roof vent, and watches a live picture on a monitor while the reel counts how many feet of cable are out. Most systems record the video, so you can watch it later and share it with anyone else you ask for an opinion.
The camera head usually carries a self-leveling lens, so the picture stays upright as the cable twists, and a small radio transmitter called a sonde. With a handheld locator above ground, the contractor can find the sonde through soil, concrete and even a basement floor, then read its depth. That is how a defect seen at 38 feet on the counter becomes a paint mark on the lawn with a depth written beside it.
Inspection is not cleaning. If the line is full of water or packed with roots, the camera sees very little. Many contractors open the line with a cable machine or a hydro jetter first, then run the camera, so the video shows the pipe walls rather than murky water. Expect the visit to include some clearing when the line is backing up.
When to book one
Signs that justify putting a camera in the line
Clogs that keep coming back
Two or more main-line clogs in a year usually mean something structural, like roots or a sag, that clearing alone will not fix.
Water at the floor drain
Any basement backup is worth a look once the line is flowing again, to see why it happened.
Buying an older house
A pre-purchase inspection on a 1920s bungalow can reveal a lateral that needs replacing before you own it.
Wet ground or odors outside
A soggy strip over the pipe route or a sewer smell in the yard points to a break underground.
Before a renovation
Adding a basement bathroom or new landscaping is easier to plan when you know the sewer's condition and route.
After a big tree comes down
Stump grinding and root rot near the line can shift soil and expose damage that was hidden for years.
What it finds
Why Indianapolis laterals show defects on camera
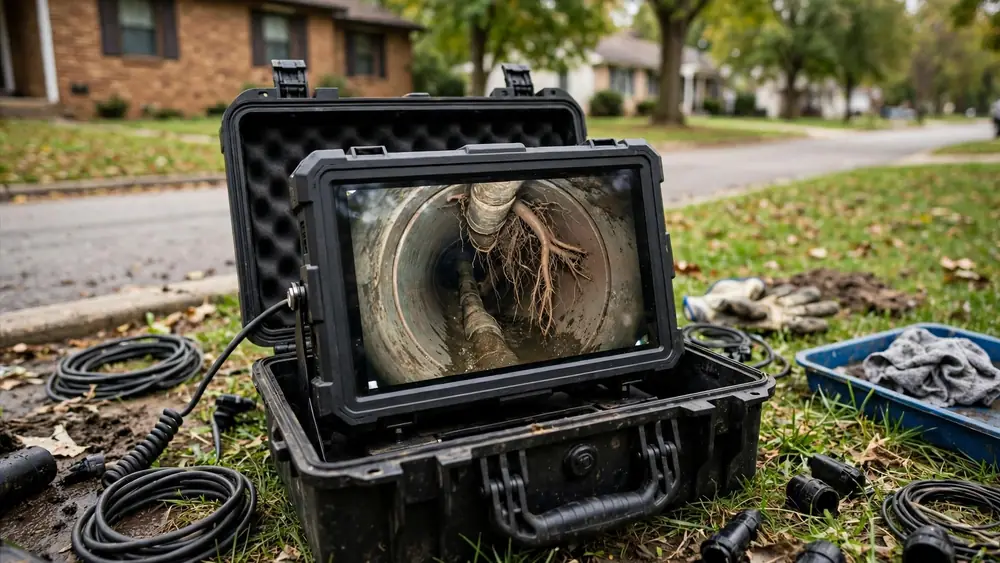
Older housing is the main reason. Much of Indianapolis inside the pre-1970 city limits was built between the 1880s and the 1950s, and those houses were usually connected to the street with two- or three-foot lengths of vitrified clay pipe [4]. Each length joins the next at a bell, and the joint was sealed with mortar or packing that shrinks and cracks over decades. A sewer camera shows those joints clearly: a dark ring, often with fine white roots hanging from it.
Houses built from the 1940s into the early 1970s sometimes have bituminized fiber pipe, which tends to soften and deform into an oval as it ages [5]. On camera it looks like a pipe that is slowly being squeezed, with blistering on the inside wall. Cast iron, common under basement floors, shows up as rough scale and sometimes a crack along the bottom where wastewater has worn it thin.
Soil and trees do the rest. Clay soils swell and shrink with the seasons and with freeze and thaw, which can shift joints out of line. The silver maples, sycamores and oaks that shade many older streets send roots toward the moisture leaking from those joints. Citizens Energy Group has itself repaired a clay lateral downtown that was more than 100 years old [6], which gives a sense of how long some of this pipe has been in the ground.
On the day
How the contractor runs the inspection
- 1
Find an entry point
A basement floor cleanout or an outside cleanout is best. Without one, the contractor may pull a toilet or use the roof vent, which limits what the camera can reach.
- 2
Clear the line if needed
Standing water or a root mass hides the pipe. A cable or jetter opens enough of the line for a useful picture.
- 3
Push the camera to the main
The contractor feeds the camera slowly, stopping at each joint, transition and defect, and notes the footage on the counter.
- 4
Locate and mark defects
At each problem spot, the locator finds the sonde from above and the contractor marks the spot and depth on the ground.
- 5
Find the connection
If the camera reaches the main, the video shows how the lateral joins it, which matters if the tap itself is damaged.
- 6
Review the video with you
A good contractor walks you through the recording and explains what each defect means before recommending anything.
Reading the video
What common sewer camera findings mean
| Finding on video | What it usually means | Typical next step |
|---|---|---|
| Fine roots at joints | Joint seals have failed; roots are drinking from leaks | Cut roots, then consider lining |
| Heavy root ball blocking the pipe | Roots have filled the bore over several seasons | Jet or cut, re-inspect, plan repair |
| Water pooling for several feet | A belly or sag in the line | Measure the length; relay the section |
| Offset joint or ledge | Soil movement has shifted a section | Spot repair or lining depending on size |
| Crack or missing piece of wall | Structural break; soil may be entering | Spot repair, lining or replacement |
| Oval, blistered pipe wall | Deforming fiber pipe | Plan for replacement or bursting |
| Grease or scale buildup | Usage or corrosion, not always a break | Cleaning and a follow-up check |
The inspection itself
Getting a clear picture of a lateral in an older house
Access shapes the whole visit. In many Indianapolis houses from the 1910s and 1920s, the main cleanout is a cast iron fitting near the front basement wall with a square plug that may not have been opened in decades. Contractors carry tools for stubborn plugs, but a cracked fitting sometimes has to be replaced before the camera can go in. If the plug will not budge, the alternatives are a toilet flange or a vent, both of which add bends the camera has to push through.
Houses on slabs or crawlspaces, more common in the post-war subdivisions on the edges of the county, usually have an outside cleanout near the foundation. That is the easiest entry of all. Where no cleanout exists, installing one is often recommended as part of a later repair, since every future clearing and camera visit goes faster with it.
A complete inspection reaches the public main. Lateral lengths vary widely: a narrow city lot with the main under the street might have 40 to 60 feet of pipe, while a deep suburban lot or a house set far back may have much more. The cable needs enough length to cover the whole run, and the camera may stop short if it meets a collapsed section or heavy roots.
Your part
What you can do before and after the camera visit
- Find the cleanout and clear boxes or shelving away from it so the contractor can work.
- Avoid running water during the inspection; flow down the line blurs the picture.
- Note dates of past clogs and any previous repairs, even partial ones.
- Ask for the video file or a link, not just a written summary.
- Ask the contractor to state the footage and depth of each defect in writing.
- Take photos of the paint marks on the lawn before they fade or get mowed.
- If you are buying the house, share the video with the seller and your agent.
- Do not rent a drain machine and push it hard into a line that may be broken; you can lodge the cable or make the break worse.
After the video
How an inspection leads to a repair plan
- 1
Rate each defect
Minor roots at one joint is a maintenance item. A crack with soil showing, a collapse or a long belly is a repair item.
- 2
Check the pipe's roundness
Lining needs a pipe that is still mostly round. A flattened or collapsed section points toward bursting or digging.
- 3
Note the depth and what is above
A defect three feet under lawn is a different job from one eight feet under a driveway or tree.
- 4
Consider the whole line
If clay joints along the full length are failing, fixing one spot may just move the problem a few feet.
- 5
Talk through methods
The contractor should explain trenchless repair, spot excavation and full replacement where each fits.
- 6
Plan the permit
If the work goes beyond cleaning, the contractor applies for a Citizens Energy Group permit and inspection [1].
Pipe materials
Lateral materials you are likely to see on the monitor
| Material | Era commonly used | How it looks on video | Usual weak point |
|---|---|---|---|
| Vitrified clay | Late 1800s to 1970s | Brown-orange wall, joint every few feet | Joints: roots and offsets |
| Bituminized fiber (Orangeburg) | 1940s to early 1970s | Black wall, may look oval or blistered | Deformation and collapse |
| Cast iron | Under floors; some laterals | Dark, rough scale, sometimes tuberculation | Corrosion and bottom cracks |
| PVC or ABS plastic | 1970s onward | Smooth white or black wall, long lengths | Sags and poorly bedded joints |
| Cured-in-place liner | Recent repairs | Seamless smooth wall, slight reduction in size | Ends and lateral connections |
Indianapolis specifics
How Citizens Energy and the city fit into a camera job
Citizens Energy Group runs the Indianapolis wastewater system and sets the rules for private laterals connected to it. According to its connection guidance, the property owner maintains the lateral from the home to the main, any work must be done by a licensed contractor or plumber, and a permit is needed for repairs, replacements, cleanouts and lining, but not for routine cleaning or root removal [1]. A camera inspection on its own is a diagnostic visit, so it normally does not trigger the permit; what you decide to do afterwards might.
If the video shows the problem is at the main or inside the public right-of-way, that is useful to know. Your contractor can tell you whether the defect is on the private side, at the tap, or in the public sewer. When the public main itself looks damaged, report it to Citizens with the footage and location so the utility can assess it.
Before any repair that follows the inspection, the contractor submits a locate request through Indiana 811 so gas, electric, water and communication lines are marked [2]. The paint and flags from that request, together with the camera marks for your lateral, give everyone a clear picture of what is underground before digging begins.
Keeping it clear
Prevention tips once the lateral has been filmed
- Keep grease, wipes, paper towels and feminine products out of the drains; flushable wipes do not break down like toilet paper.
- If the video showed roots at a few joints, ask how often clearing is likely to be needed and schedule it before the next backup.
- Plant new trees well away from the sewer route you now know from the locate marks.
- Keep the inspection video with your house papers; it is the baseline for the next inspection.
- Re-inspect after major work near the line, such as a new driveway, a fence row or stump grinding.
- Have a camera run after any repair to confirm the new section is clean, straight and properly connected.
Repair or monitor
When a camera finding can wait and when it can't
Not every defect needs immediate repair. A few fine root intrusions in an otherwise round clay line can be managed with periodic cutting for a while, especially if the house has light use. Minor scale in cast iron may just need cleaning. A contractor who shows you the video and explains which defects are cosmetic and which are structural is doing the job properly.
Some findings should not wait. A collapsed or crushed section, a break with soil visible, a belly holding several feet of water, or a separation at a joint where the camera can see dirt are all places where sewage is leaking into the ground and soil is entering the pipe. Those tend to get worse each season and can lead to a backup without warning.
Between those extremes is judgment. A line with roots at nearly every joint will keep growing them back, and repeated cutting can loosen joints further. In that case lining or replacement is usually the longer-lasting answer. The inspection video is what lets you make that call with your contractor rather than guessing.
Buying a home
Scoping the sewer before you close on an older house
A general home inspection looks at the plumbing you can see: fixtures, supply pipes, the water heater and visible drain lines. It rarely includes the buried lateral, and that is the part most likely to surprise a buyer of a 1920s house in a tree-lined neighborhood. A separate sewer scope during the inspection period gives you facts while you can still negotiate or walk away.
Arrange it through your agent, since the seller has to allow access and someone has to be home to open the basement. Ask the contractor to run the camera all the way to the main if possible, record the whole run, and give you a written note of the footage and type of each defect. Ask them to name the pipe material, because clay with a few roots and flattening fiber pipe lead to very different conversations.
If the video shows serious defects, the usual options are asking the seller to repair before closing, asking for a credit, or accepting the house as it is with a repair planned. Whatever you decide, keep the video. It becomes the baseline for every future inspection and is useful to the next buyer too.
Related problems
Problems a sewer camera helps tell apart
Several symptoms look alike from inside the house. A slow drain throughout the home might be a main-line clog, a vent problem or a partly closed backwater valve. A sewage smell might be a dry trap, a cracked vent stack or a broken lateral. The camera separates these by showing whether the main line itself is clear and intact.
The video also helps with root intrusion removal by showing exactly where roots enter and how thick they are, and with sewer backup cleanup by confirming the line is flowing before anyone starts drying out the basement. For a broader look at warning signs, read signs of a broken sewer line.
FAQ
Sewer camera inspection questions
How long does a sewer camera inspection take?
A straightforward run from a basement cleanout to the main usually takes under an hour. Clearing a blocked line first, opening a seized cleanout plug or locating several defects can stretch the visit.
Do I need a permit for a sewer camera inspection in Indianapolis?
No. Citizens Energy Group requires permits for lateral repairs, replacements, cleanouts and lining, not for diagnosis, routine cleaning or root removal. Any repair that follows the inspection will need one.
Can the camera tell me exactly where to dig?
Yes, within a small margin. A transmitter in the camera head lets the contractor find the spot from the surface with a locator and read its depth, then mark it with paint or flags.
Should I get the sewer scoped before buying a house in Indianapolis?
It is worth considering for any older home, especially one built before the 1970s or with big trees near the front yard. Standard home inspections usually do not include the lateral.
Why couldn't the camera reach the street?
Common reasons are standing water, a heavy root mass, a collapsed section, a tight bend or a cable too short for a long lateral. The contractor may clear the line and try again, or enter from another point.
Will I get a copy of the video?
Ask before the visit. Most modern systems record to a file or upload a link. A copy lets you get a second opinion and keep a baseline for future inspections.
Can a camera inspection damage my pipes?
A camera pushed with care through an open line is very unlikely to cause damage. The risk is forcing it through a collapse or past a sharp break, which experienced operators avoid.
What if the problem is in the city's main?
If the video shows damage in the public sewer rather than your lateral, report it to Citizens Energy Group with the footage and location. The private lateral and the connection remain the owner's responsibility.